The Carryx is a touch-screen portable X-ray machine that uses Toshiba’s tube. Its main function is to produce X-rays. It can get pictures of 2-3 teeth by matching dental film or dental sensor.
Operation of the Carryx portable dental X-ray machine is very simple.
1. Press the switch key, the screen will automatically light up, and the dental X-ray machine will enter the working state.
2. The machine defaults to film mode. If you are using film, you first need to select the adult or child mode after turning on the camera, then select the tooth position to be shot, and finally you can adjust the exposure time.
3. If you are using a dental sensor, you need to select the sensor mode after powering on, then select the tooth position to be photographed, and finally adjust the exposure time. (When you select a mode and a tooth position, the center of the portable X-ray machine screen will automatically display the corresponding exposure time, which is the exposure time recommended by the system.)
4. Align the X-ray tube of the Carryx dental portable X-ray machine vertically with the dental film or dental sensor, keep the distance between the front end of the X-ray tube and the target tooth at about 11cm, and then press and hold the exposure button until the beeping sound ends.
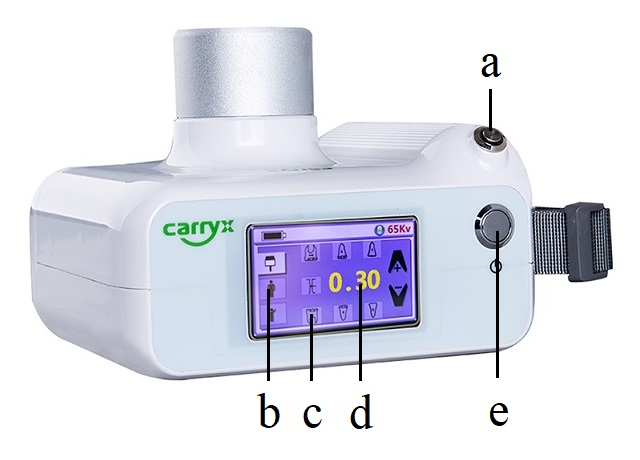
a: Exposure key
b: Three modes
c: Tooth position
d: Exposure time
e: Switch
Finally, remember to charge your portable dental X-ray machine. The Carryx’s removable battery can get around 100 exposures per charge. Also remember to check to see if it needs charging if you haven’t used it for a long time.
Post time: Jul-08-2022
